How to Reupholster a Dining Room Chair
Article By | Leslie Segrete, The Money Pit
If you enjoy hosting large gatherings, figuring out how to fit twenty people around a table for twelve while having living and dining rooms that are both well-designed and functional can be a challenge!
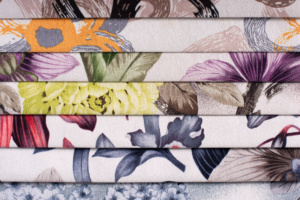
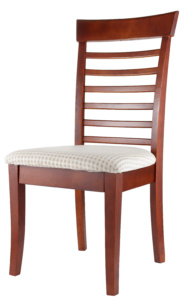
You can easily update the look of your dining room and create some inexpensive spare seating by shopping thrift store furnishings and changing the fabric on the seat cushions. Depending on the seat dimensions and pattern of the fabric you choose, you can usually get three cushion covers out of one yard of fabric. This simple upholstery project might just inspire you to change those chair cushions every year!
Tools & Supplies:
- Arrow T50elite™ ™ Staple & Brad Nail Gun
- Arrow 3/8-inch T50® staples
- Measuring tape
- Scissors
- Dressmaker’s chalk
- Fabric
- Screw gun or manual screwdriver
Chair Cushion How-To:
- Turn your chair upside down on top of your work surface so that the back of the chair hangs over the surface’s edge. Remove the four screws holding the cushion onto the chair itself, and set aside. If the existing screws are stripped, replace them with Phillips-head screws of the same size.
- Remove the existing fabric from the cushion by prying out all of the original staples. If you are able to remove the fabric intact, use it as a pattern for the new cover; otherwise, use the cushion to create the pattern.
- Lay your fabric face-down on your work surface, and place the cushion onto the patterned area of the fabric to be displayed. Trace the cushion’s shape onto the fabric using dressmaker’s chalk; then measure the thickness of your cushion plus an inch of stapling allowance, and use this measurement to trace a second line around the first to get your final cutting pattern for the cushion.
- Cut the traced pattern from the fabric, and use this cut shape as the pattern to cut any other cushion covers for like chairs from the fabric.
- Lay a cut piece of the fabric face-down on work surface, and place a cushion on top. Starting on the edge of the cushion farthest from you, fold the edge of the fabric over half an inch so that you have a clean, non-frayed edge to staple into. Pull the fabric up and onto the cushion and use your Arrow T50elite™ Staple & Brad Nail Gun to place a 3/8-inch staple in the center. Work your way out to either end of the cushion edge, stapling every inch or so and stopping about 2 inches from each corner.
- Turn the cushion around so that you are now working on the edge opposite the one you just finished, and secure to the cushion in the same manner. Then proceed to secure the remaining two sides.
- To staple the fabric at the corners, gently pull the fabric up and over the corner so that you have a smooth and clean face at the corner, then place a staple just inside of the corner. Gather the fabric that extends from the corner to the area on the side that has already been stapled so that you have a smooth edge on the side (this will be seen when the cushion is reattached). Staple gathered fabric in place and repeat for all remaining corners.
Reattach covered cushion the seat of the chair frame using reserved screws.
About Leslie Segrete Leslie Segrete is co-host of The Money Pit. She’s a home improvement expert with an eye for design and the skills to get the job done. She knows what turns a house into a home and has the tips and ideas to make improvements easy and fun. Leslie is a seamstress, carpenter, decorator, designer and professional chef all wrapped up in one very energetic package. She’s a true renaissance woman through and through!
Editor’s Note: Tom Kraeutler hosts the nationally syndicated radio show “The Money Pit”, carried right here on WTAW NewsTalk 1620 (Saturday, 7-9 A.M.). Listeners are invited to ask home improvement questions at anytime by calling the show’s 24-hour toll-free hotline at 1-888-MONEY-PIT. Questions will be responded to in their next regularly scheduled broadcast. For more great home improvement tips, guides, and advice, visit the show’s website at www.moneypit.com. Copyright 2021 Squeaky Door Productions, Inc. All Rights Reserved

