 Do-It-Yourself: Limewash Your Home, Because WHY NOT?
Article and Photos by | Lizzie West
Find the printed version of this article in our digital edition online now (page 8)!
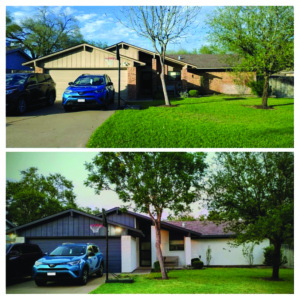
Our home was built in the late 70’s and was the most beige thing you’d ever seen. We knew when we bought it that we would want to make some improvements to the outside. We didn’t know what to do or how to do it but this home met all our needs otherwise, so we went for it.
After getting settled into our home, I started to do research on how to update the brick exterior. We chose a paint color for the siding (Mineral Grey by Sherwin Williams) and made that update to start. I read so many horror stories about “painted brick” – how it can be bad for the masonry or cause issues down the road. I also heard that the maintenance of painted brick can be a hassle, with peeling or difficult up keep. I thought – Should I give up? Are there no other options?
Eventually, I stumbled on some information about Limewashing – LOTS of YouTube videos, too. Limewash is a hydrated lime solution with the texture of clay that you purchase in tubs and water down for application. This is a subjective part of the process. You can water it down more for a sheer application, or add less water for a more opaque application. Keep in mind – it calcifies as it dries so it become more opaque after the limewash cures and you’ll see the final result a day or so after it dries.
One of the benefits of limewashing is the antiqued effect it develops over time that is often called a “patina.” Unlike paint, it wears off gradually instead of peeling. Areas with less protection from the elements wear off more quickly, creating this antiqued appearance. However, you can keep extra limewash around for touching up if certain areas wear off more quickly than you’d like. We have yet to perform any touch ups and our house was limewashed almost 2 years ago with a one coat application. Some people have applied as many as 4 coats initially for a long-lasting solid finish. Otherwise, you can embrace the idea of the patina and go well over a decade between applications. I’m sure you’re curious how we completed this process. First, you’ll need to purchase some things.
What you need:
- Limewash of your choice. We chose Avorio White by Romabio. There are lots of options and color variance these days. Look around to find the perfect option for you.
- Limewashing brushes – you’ll want at least two, one for wet application and one for dry brushing
- A bucket with lid
- A drill attachment to mix limewash and water
- Ladders or step stools
- A water hose
- Tape and plastic to mask off areas you don’t want limewashed
- Protective wear and painting clothes (goggles and gloves aren’t a bad idea)
- Touchup house paint and a brush
- Time and patience
 How to:
Pick a side of your home that act as the “tester” for the process, one that will be less visible to others while you work out the process and your rhythm. You’ll want to commit to doing a whole wall at a time because stopping mid-wall can result in some patchiness or obvious overlapping in the process.
We started with about a 50/50 mixture of the limewash clay mixture to water, but ended up adjusting it to about 40/60 limewash to water ratio. It helped give us the desired results as well as saving a little money on limewash. We wanted to see a very slight bit of the darkest parts of the brick subtly peeking through the finish so the antiqued effect would be most appealing to us over time. If you want a more sheer application, use less limewash and more water.
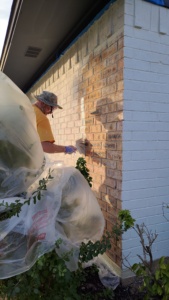
Prepare the areas of your home’s exterior that you don’t want to get limewash on with tape and plastic sheeting. Limewashing can be a bit of a messy process. We didn’t realize how messy until we had been working on it for a few days, then we employed the goggles and gloves.
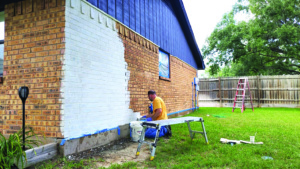 Start by spraying down the brick with a water hose. It cleans the area but also it helps the limewash to dry at the correct speed in order to absorb as intended into the brick. Wait about 5 minutes and then start the limewashing process. You can re-wet the brick before application throughout if you are working on a large area, but we never found the need to do that.
We found it worked best to start in vertical sections spanning about 2 feet across. My partner would apply the initial coat of limewash and I would work behind to smooth everything out with a dry limewash brush. We learned our lesson on day one about completing an entire exterior wall in one session. We had an obvious jagged line where the limewash overlapped. We knew we would have to have time, material, and good weather before starting on each section in the future.
We took our time and did one to two complete exterior walls each application session. It’s a relatively forgiving process overall and took us about a week to complete the whole house.
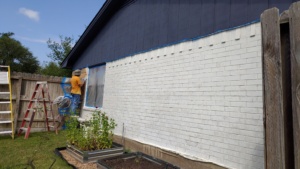 Some people like to spray some of the limewash off to give that patina to their exterior initially. We chose not to do that. But you can use a garden hose with a spray nozzle on it to adjust the opacity of the wash on your brick for up to 5 days after initial application.
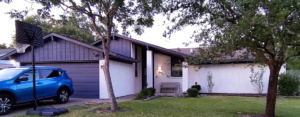
Once we finished the application and removed all the masking, inevitably some limewash did seep through to the siding we had already painted. Since it made the edges of the painted areas imperfect, I went around the house on a short ladder and just touched up those areas with house paint and a small brush. We are pretty detailed with our projects, so this step really would be up to your personal preference. And – Voilà – you have a bright and updated look that isn’t harmful to the underlying brick and also is relatively easy to maintain.
